Admin DashboardAdministrative Features
Back to HomeManage CRM Pipeline
Track leads to enrollment, manage enrollments, waiting lists, contracts, and contact logs using the built-in CRM.
The CRM helps Administration manage the full journey from first contact to enrollment in one place. Use it to capture inquiries (Leads), convert them to students (Enrollments), manage demand when seats are full (Waiting Lists), formalize agreements (Contracts), and keep a searchable communication history (Contact Logs).
- Why this matters: fewer spreadsheets, consistent records, faster follow‑ups, and clear ownership of every prospect.
- Who uses it: Admin and office staff responsible for admissions and family communication.
- When to use it: Any time a new inquiry arrives, follow‑up is needed, capacity is limited, or agreements must be signed.

Important
For detailed instructions on how to create, edit, search, filter, and manage users through tables, please refer to the Tables Guide. All pages use the same table interface with consistent actions and features.
How to Use
Enrollments
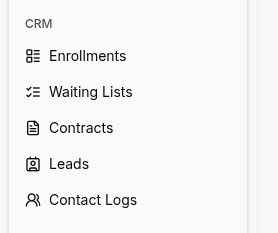
- Navigate to Enrollments (left sidebar under CRM section).
- Click Add Enrollment to enroll a student (from an existing lead or directly).
- Select class/course, start date, and any required fields.
- Save to add the student to active enrollments.
- Use sorting and filtering to manage current enrollments.
Waiting Lists
- Navigate to Waiting Lists (left sidebar under CRM section).
- Click Add to place a student on the waiting list and set priority/weight.
- Update position when seats open; record notification status.
- When ready, proceed to Enrollments to add the student.
Contracts
- Navigate to Contracts (left sidebar under CRM section).
- Create a contract from a template; fill names, dates, and terms.
- Send for signature (e‑signature or manual).
- Save the signed copy and mark the contract as active.
- Archive or cancel when replaced or withdrawn.
Leads (New Inquiries)
- Navigate to Leads (left sidebar under CRM section).
- Click Add Lead and enter contact details, interest, source, and notes.
- Assign the lead to a staff member for follow‑up.
- Save to create the lead.
- Use the list controls to sort, filter, and search leads.
- Open a lead to view details and create Contact Logs directly.
Contact Logs (History)
- Navigate to Contact Logs (left sidebar under CRM section).
- Click Add Contact Log to record who contacted whom, how, and why.
- In the table you can:
- Sort by Contact Type, Contact Date, Lead, Enrollment, Contacted By
- Filter each column (type‑ahead text)
- Select rows (checkbox) for bulk actions
- Edit a row (Actions → Edit) in a dialog
- Delete a row (Actions → Delete) with confirmation
- Keep entries short, factual, and record next steps.
For Organization Types
- Track technical screening in Enrollments and link to portfolio/GitHub.
- Use Contact Logs for coding challenge invitations and outcomes.
- Contracts can include project‑based milestones.
- Use Enrollments for tryout results and placement notes.
- Waiting Lists help manage seasonal team capacity.
- Contracts can include competition and travel clauses.
- Keep parent contact history in Contact Logs (meetings, calls).
- Enrollments can include recitation/placement notes.
- Contracts cover tuition plans and scholarship terms.
Tips
- Use the left sidebar to jump directly to Leads, Enrollments, Waiting Lists, Contracts, or Contact Logs.
- Filter lists first, then open details to work faster.
- Keep Contact Logs concise and record clear next steps.
- Use templates for contracts to reduce errors and standardize terms.
- For any data tables, see the Tables Guide for sorting, filtering, and export.