Admin Dashboard
Back to HomeUser Management & Permissions
Manage users, roles, and access permissions across your organization.
User Management allows you to create, edit, and control access for all users in your organization including students, teachers, parents, and administrators. Users are created automatically when you add people through the HR Management pages.
Important
For detailed instructions on how to create, edit, search, filter, and manage users through tables, please refer to the Tables Guide. All pages use the same table interface with consistent actions and features.
How to Use
Creating Students
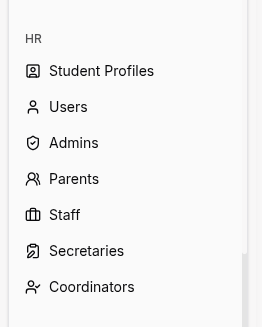
- Navigate to Students from the sidebar (under HR Management).
- Click the Add Student button in the top-right corner.
- Fill in the required fields:
- Name - Full name of the student
- Email - Email address for login and notifications
- Phone (optional) - Contact phone number
- Date of Birth - Student's birth date
- Add additional information as needed (address, parent info, etc.).
- Click Save to create the student.
- A user account is automatically created and the student receives login credentials via email.
Creating Admins
- Navigate to Admins from the sidebar (under HR Management).
- Click the Add Admin button.
- Fill in the required fields:
- Name - Full name of the admin
- Email - Email address for login
- Phone (optional) - Contact phone number
- Click Save to create the admin.
- A user account with full admin permissions is automatically created.
Creating Parents
- Navigate to Parents from the sidebar (under HR Management).
- Click the Add Parent button.
- Fill in the required fields:
- Name - Full name of the parent
- Email - Email address for login
- Phone - Contact phone number
- Link the parent to their student(s) by selecting from the student list.
- Click Save to create the parent.
- A user account is automatically created with access to linked student data.
Creating Staff (Teachers)
- Navigate to Staff from the sidebar (under HR Management).
- Click the Add Staff button.
- Fill in the required fields:
- Name - Full name of the teacher
- Email - Email address for login
- Phone (optional) - Contact phone number
- Subjects - Assign subjects the teacher will teach
- Optionally assign specific Classes for each subject.
- Click Save to create the staff member.
- A user account with teacher permissions is automatically created.
Creating Secretaries
- Navigate to Secretaries from the sidebar (under HR Management).
- Click the Add Secretary button.
- Fill in the required fields:
- Name - Full name of the secretary
- Email - Email address for login
- Phone (optional) - Contact phone number
- Click Save to create the secretary.
- A user account with secretary permissions is automatically created.
Creating Coordinators
- Navigate to Coordinators from the sidebar (under HR Management).
- Click the Add Coordinator button.
- Fill in the required fields:
- Name - Full name of the coordinator
- Email - Email address for login
- Phone (optional) - Contact phone number
- Click Save to create the coordinator.
- A user account with coordinator permissions is automatically created.
Editing User Information
- Navigate to the relevant HR page (Students, Admins, Parents, Staff, Secretaries, or Coordinators).
- Use the search bar or filters to find the specific person.
- Click on their row to open their profile.
- Click the Edit button at the top of the profile.
- Update any necessary information (name, email, phone, assignments, etc.).
- Click Save Changes to apply updates.
- The associated user account is automatically updated.
Deactivating or Deleting Users
- Navigate to the relevant HR page.
- Find and click on the person's profile.
- Choose one of the following:
- Deactivate - Person cannot login but data is preserved
- Delete - Permanently removes person and their user account (use with caution)
- Confirm the action when prompted.
Bulk Import
- Navigate to the relevant HR page (e.g., Students for bulk student import).
- Click Import button.
- Download the CSV template provided.
- Fill in the template with data (name, email, etc.).
- Upload the completed CSV file.
- Review the import preview for any errors.
- Click Confirm Import to add all records.
- User accounts are automatically created for all imported people.
Permission Levels by Role
Admin:
- Full access to all system features
- User management through HR pages
- Financial data and reports
- System settings and configuration
Staff (Teachers):
- Access to assigned classes and subjects
- Gradebook and attendance management
- Lesson planning and homework assignment
- Student performance tracking
Student:
- View own schedule and grades
- Submit homework and assignments
- Access learning materials
- View attendance records
Parent:
- View linked children's grades and attendance
- Access financial information (payments)
- Receive notifications about children
- Communication with teachers
Secretary:
- Student enrollment and records
- Payment processing
- Class scheduling support
- Limited financial reports
Coordinator:
- CRM and lead management
- Enrollment processing
- Contact log management
- Waiting list oversight
For Organization Types
Bootcamp-specific fields when creating users:
- Students: Include GitHub username for portfolio integration
- Staff (Teachers): Assign coding challenge creation permissions
- Instructors: Technical mentorship role with code review access
Sports Academy-specific fields when creating users:
- Students (Athletes): Include physical assessment data and health records
- Staff (Coaches): Assign training program management permissions
- Medical Staff: Health and injury tracking access only
- Parents: Additional access to health and nutrition data
Madrasa-specific fields when creating users:
- Students: Track Quran memorization progress
- Staff (Teachers): Include Islamic studies qualification credentials
- Imams: Religious education oversight role
- Arabic Language: Assign RTL interface preference per user
Tips
- User accounts are created automatically when you add someone through any HR Management page - no separate user creation needed.
- Use bulk import to save time when adding multiple people at the start of an academic year.
- Deactivate users instead of deleting them to preserve historical data and records.
- Set up parent accounts early to enable communication and payment tracking from day one.
- Use the filter and search features to quickly find people in large organizations.
- Export lists as CSV for backup purposes or external reporting needs.
- New users automatically receive login credentials via email when their account is created.
- All user management happens through the HR Management section in the sidebar - there's no separate "Users" page.